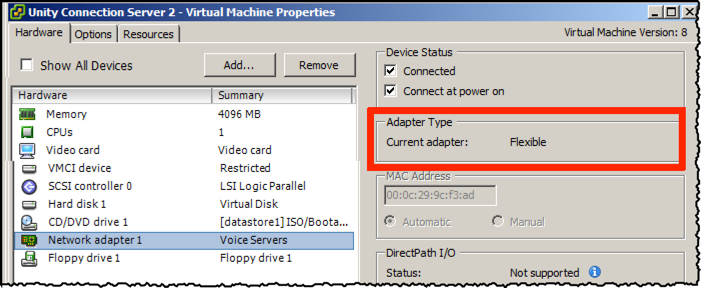
When upgrading to Cisco UC version 10.x or higher, from version 9.x or earlier, you are required to change the vNIC adapter type from “Flexible” to “VMXNET 3”.
|

|
There are two ways to accomplish this; however, both methods require the virtual machine to be shut down.
1. If your vNIC is configured with a static MAC address, simply remove the existing vNIC and add a new vNIC with adapter type “VMXNET 3”.
2. If you vNIC is configured with a dynamic MAC address, you’ll need to download the .vmx file, edit it to include the string “ethernet0.virtualDev = “vmxnet3”, then upload it back to the appropriate virtual machine directory in the datastore and start your virtual machine back up.
To edit the .vmx file (cucpub.vmx), run the following commands from a command prompt:
copy “cucpub.vmx” cucpub_backup.vmx
findstr /V /R “^ethernet0.virtualDev.*” temp_file.vmx > “cucpub.vmx”
echo ethernet0.virtualDev = “vmxnet3” >> “cucpub.vmx”
Upload the .vmx file back to the appropriate virtual machine directory on the datastore. Remove the virtual machine from inventory, then re-add it back to inventory. Check the vNIC settings to verify the adapter type is now VMXNET 3 and start the virtual machine.