With the move to Linux for the operating system on UCCx version 8 and higher, the process for accessing the UCCx database for real-time statistics has changed. To gain off box access to statistics, we need to configure another server to provide access to the data. The process below assumes IIS is already installed and configured to support ASP and ASP.NET.
Prerequisites for this example:
- Windows Server
- IIS server with ASP/ASP.Net enabled and IP connectivity to the UCCx server(s)
- Informix database drivers installed from Cisco Unity Tools or another source
- Source wallboard files installed on IIS server
Process:
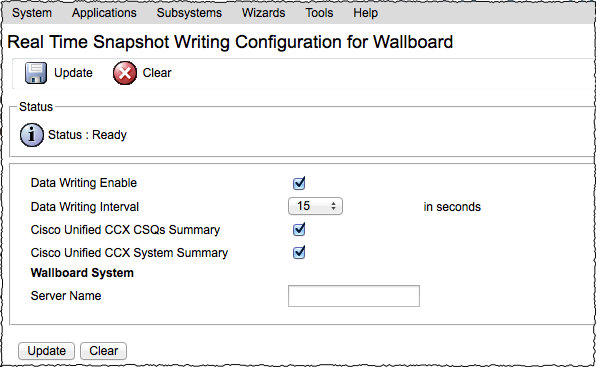
- Configure parameters under Real Time Snapshot Configuration for Wallboard on the UCCx server.
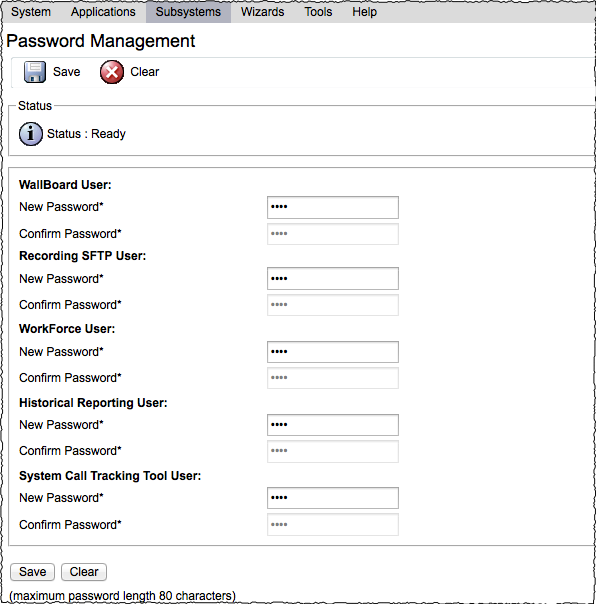
- Set the passwords for WallBoard User and Historical Reporting User on the UCCx server. Make a note of these passwords for later.
- Install the Informix database drivers on a Windows server.
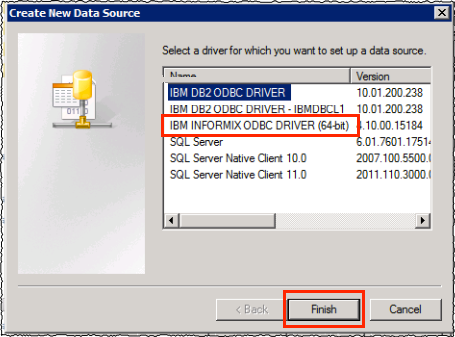
- Create a new DSN pointing to the UCCx server. In this example, we’re using the 64-bit driver; however, you may have a 32-bit driver installed.
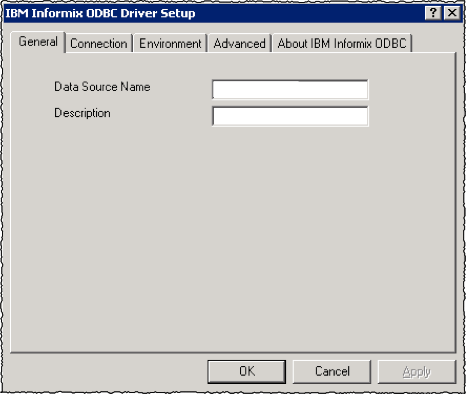
- Define the Data Source Name and enter a brief description, then click OK.
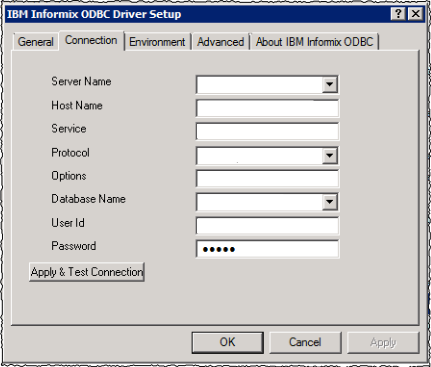
- Configure the following parameters on the Connection tab of the DSN configuration:
- Server Name – Instance name of the UCCx database. (see Notes for guidelines)
- Host Name – IP address of UCCx server
- Protocol – always “onsoctcp” (no quotes)
- Database Name – “db_cra”
- User ID – “uccxhruser”
- Password – password set on Password Management page for Historical Reporting User.
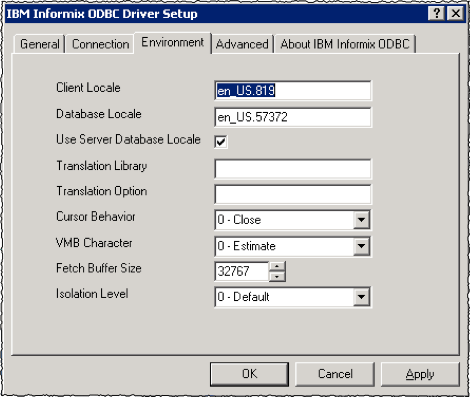
- On the Environment tab, set the following parameters:
- Client Locale – “en_US.819”
- Database Local – leave at default, or check Use Server Database Locale checkbox if a locale error occurs.
- Copy your wallboard files to the appropriate directory on the IIS server. Update the settings in the parameters.cfg file to match your environment.
- Open the web browser of your choice and access the wallboard home page.
When defining the database instance name, use the following guidelines:
■ Convert all uppercase characters to lowercase characters
■ Replace all hyphens with underscores
■ If the host name starts with a number, add the prefix i
■ Append _uccx to complete the instance name. For example, if your host name is 901-CCXMain, your instance name will be i901_ccxmain_uccx.

